Provide Examples - Train PlantAI™
In this step, we provide instructions in running the PlantAI™ tool through the following steps: creating examples of the target plants, reviewing the results in a test area, refining our examples further (if needed), applying them to the whole field, then finally choosing the metrics we wish to use with our detected plants.
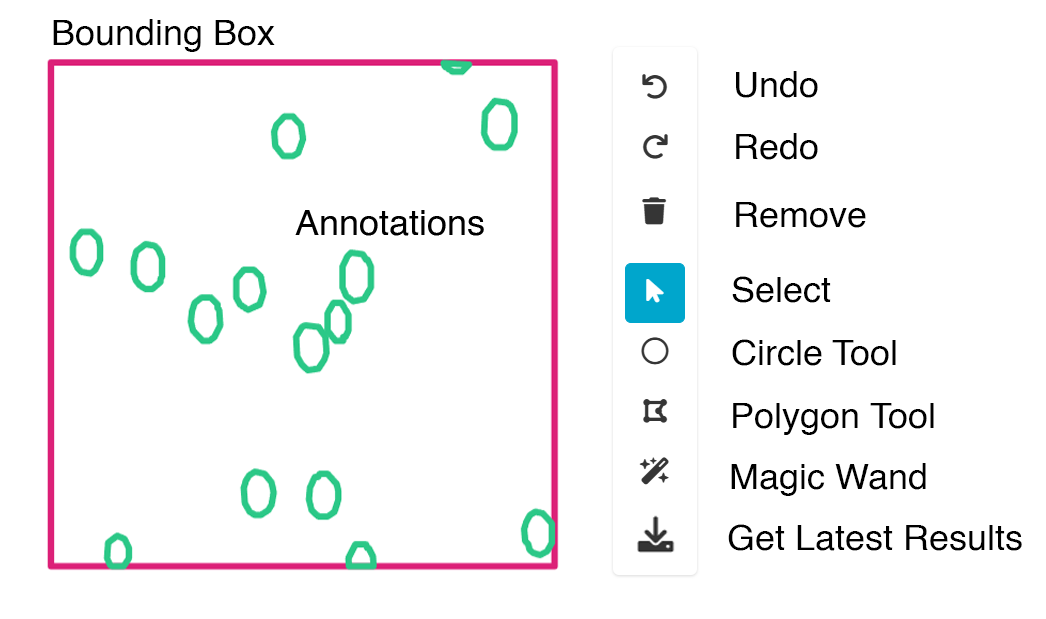
Here is a visual guide that illustrates the process of training PlantAI:

Add Examples
- Use the mouse wheel or zoom control buttons to zoom into an area of the field that contains relevant plant samples to be counted.
- We recommend to include some elements or other plants that you DON'T wish to count to help the tool learn to differentiate.
- Once zoomed in, use either the circle, square or polygon tool (which are visible will depend on the detection type) to draw an "annotation" around 3 representative examples of the plant you wish to count.
- A bounding box will appear in which you will create additional sample annotations.
- TIP 💡You can use the "Shift" key together with the polygon tool to draw a free-form shape.
- Click the magic wand icon 🪄 to try and automatically detect additional similar plants within the bounding box.
- If the results look good, you can keep them.
- If not, use the Undo button or the Select tool to delete incorrect selections.
- If necessary, use the circle or polygon tool to annotate any missed samples.
- NOTE 💡 It’s important that ALL plant samples within the bounding box are annotated.
Add Examples (Video)


- You can (and should) create additional examples to help train the PlantAI Mode and continue the same process as previously described.

- When satisfied with your selections, click “Continue.”

- If you are running a second round of examples after reviewing initial results, go to the instructions below.
Need to improve?
- If the results obtained are not what you want, you can add further examples OR revisit your existing examples and refine them further; tightening boundaries to exclude irrelevant areas (like soil), ensuring all plants within the bounding box are selected, moving the bounding box to an area that represents your plants better, and so on.
- Otherwise, create additional examples by selecting “Add Examples.”
- Another bounding box will be created.
- You can move the box to another area or start adding more samples where it is.
- To save time, select the “Get from Latest Result” tool to load annotations from the previous detection. (Now visible in the PlantAI Toolbox on the right of the screen)

- As before, you can use the magic wand to try and automatically detect further examples.
- Use the Square, Circle or Polygon tool to add further examples as needed.
- You can (and should) create additional examples to help train the PlantAI Mode and continue the same process.
- Click “Continue” to run the detection as before and repeat this workflow of reviewing and annotation until satisfied with the accuracy.
- TIP💡 To assist in identifying problematics areas, you can disable the view of the photomosaic by selecting the "Show Background Map" icon in the top right corner.

- Select “Proceed with Whole Field” and continue to Analyze Whole Field